|
As our project comes to a close, we would like to reflect on, and summarize, our results and findings. At the beginning of our project, we created an assessment tool to evaluate our student's oral language skills. We captured audio recordings of our student's communication skills using the apps Draw and Tell and Explain Everything, to provide a baseline that we could refer back to later. Other apps were introduced to further engage and motivate our students to share their learning, thus further enhancing and developing their communication and thinking skills.
As we progressed through our project, we constantly referred back to our baseline recordings, in order to determine our student's growth and next steps. At the end of the project, we re-evaluated student work samples using our initial assessment tool. We found that most students showed significant growth and improvement in many of the identified skills. Students who initially scored a level one or two, now scored a two or three on our assessment rubric. Our direct instruction enabled our students to effectively share their thinking in a clear, organized way. What's more, our students' engagement improved tremendously, and for most of our students, their confidence also increased. For those students who's growth was not as significant, we realized as the year went on that there were other mitigating factors and learning issues that were roadblocks to their success. For example, some of these students were English language learners, while others had speech/communication disorders. Some had other diagnoses, such as Autism, while still others may not have been developmentally "ready." As we continue on our learning journey, we cannot help but wonder:
For now, we would like to thank all of the people who supported us along our journey. To the Ontario Teacher's Federation for the opportunity to engage in this project. To our colleagues for encouraging us and being interested in our project. To ETFO and the WRDSB for giving us an opportunity to share our project with other colleagues. Finally, thank you to our students, for always being open and excited to learn. For a complete description of our project, please refer to the OTF website, under Teacher Learning Co-Op.
0 Comments
We were able to share our learning with our families and other educators in a variety of ways. In addition to our blog, we shared student work samples on our Twitter accounts as well as with our colleagues on a WRDSB online Kindergarten conference. We held an in-service for our colleagues, outlining our project, and shared the apps we used. Both classroom teachers and DECEs attended, and left with an understanding of how to use open-ended iPad apps to enhance student learning.
We were also fortunate enough to attend and present at the ETFO: Seeing, Engaging and Empowering the Learner conference, on April 1, 2017. Our presentation was two hours in length, and addressed and shared our learning with other Kindergarten educators from across the province. We also presented at the Digital Learning Symposium, to system leaders and colleagues held by the WRDSB, on the use of iPad apps to document student learning. Links to our presentation slides can be found under the 'Resources' tab of this blog. Through our sharing, we also inquired about our colleagues use of iPads in their own classrooms. We found that although the majority of our colleagues from across the province have access to several iPads in their classrooms, many of them were not used on a regular basis, or were not accessible for students to use to document their own learning. We also found that most of our colleagues were using iPads for their own documentation by taking pictures or videos, but were not always using the iPads in ways where the students could interact and create content with them. We also learned how some of our colleagues assumed that if students were practicing content-based skills (i.e., letter tracing, math facts), they were engaging with technology in meaningful ways. We noted, that although these kinds of apps serve their purpose in certain settings, we found these open-ended apps allowed for so much more collaboration, consolidation, and development of critical and creative thought. Several of those who attended our presentations appreciated the introduction of these apps and the student work samples showing how they were used in a variety of ways in our classrooms. Upon reflection, we found that by pushing ourselves outside of our comfort zones and presenting to our colleagues, we solidified our own knowledge of our topic. Particularly, while working with those at the ETFO Kindergarten conference as they practiced using these apps, we were able to problem-solve, trouble-shoot, and collaborate alongside our colleagues. We found these experiences validated our work, yet also provided us opportunities to discover new ideas and wonderings about our research. With some of our students well on their way to becoming proficient in using Chatterpix, we thought there may be a great learning opportunity in allowing these expert students to teach their peers how to use the app. We thought that peer-peer teaching might both motivate the 'learner' students to try Chatterpix (it was recommended by a friend, after all) and provide a way for the 'expert' students to continue to develop their oral communication and problem-solving skills, as well as their confidence! We did this in a variety of ways. Two classes made anchor charts to assist the students in learning and teaching Chatterpix, while another, provided verbal support while students taught their peers. 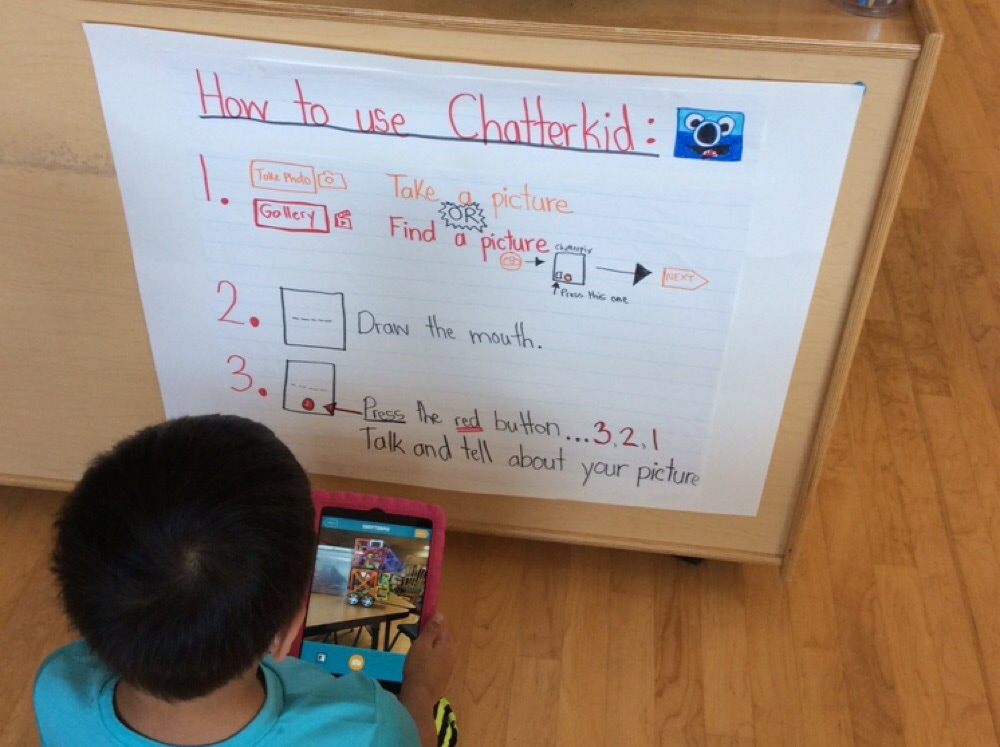 One teacher developed her anchor chart with the expert students. While these students were beginning to teach their peers, one by one, how to use Chatterpix, they would sometimes seek out the anchor chart if they forgot a specific step. Specifically, we found that in Chatterpix, it is more difficult to find a photo to use that was taken earlier with the ipad camera, than to take a photo within the app. The students found the anchor chart useful for remembering how to import a photo taken earlier.
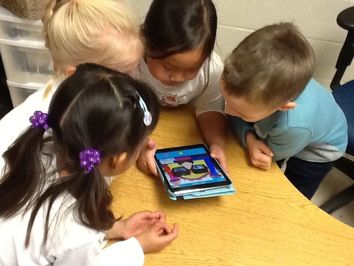
As with the other apps we have tried, when students in our classes saw the expert students independently using these tools, they were excited to learn how to use them too! The experts were made pretty busy! We were able to sit back and observe how the experts taught their peers, and noticed individual differences in the experts' ability to explain what their peers should do, versus just pressing the buttons for them. This provided us with teachable moments and great documentation! After broadening the number of students in our classes who used the app, we made some discoveries while watching various students try it out. We found that one type of student might find the fact that their recording is limited to one minute and counts down throughout the recording, stressful. This kind of student might rush through what he/she wanted to say, trying to make sure he/she gets to fit it all in. Another student may find that the timed recording motivates them to be more succinct in their explanations, as compared to a tool such as Explain Everything, that has a longer recording time and doesn't count down while you are recording. As our experts continue to teach their peers, we are excited to see how their explanations grow in detail, and to watch more learning take place! 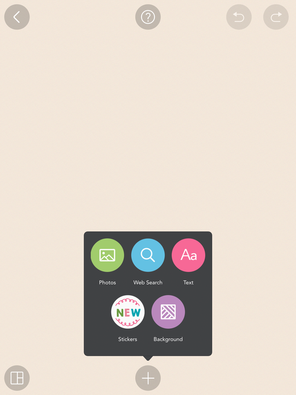 As we were diving deeper into the school year, we noticed that our students were engaging in more in-depth projects that developed over time, or they were eager to share a process that was continually evolving. We also were noticing that some students who engaged in research projects where they created a ‘ChatterPix’, seemed to be looking for something more. When reflecting about what content-creation app might be best suited for these needs, we thought of Pic Collage. Pic Collage is an app that we were all very familiar with ourselves, as we have used it for our own documentation. However, passing the app over to the students was something we hadn’t done much of. We knew that at this point in the school year, many of our students were becoming increasingly able to record their thoughts and observations in writing with phonetic spelling, and thought the text feature in Pic Collage may be a motivating way for them to ‘write’. We also knew that the photo collage capabilities would be able to capture multiple moments of a process and the evolution of a project. In using Pic Collage with our students, we found it very easy for them to use and navigate independently with minimal introductory instruction. The icons to add text and photos are easy to find, and don’t require reading skills. Moving, manipulating, and enlarging text is done with simple finger motions, and there is an undo button in the top corner to fix any mistakes that might occur. We used this app in a variety of different ways with our students, including:
When students were finished with Pic Collage projects, they had the option to ‘app smash’ it into Explain Everything or Draw and Tell as a way for them to further explain their thinking. The novelty of introducing another app seemed to help motivate our students. We also noticed that our students who were reluctant to put their ideas on paper, seemed more comfortable using this app as a writing tool. Check out some of our student's work samples below. 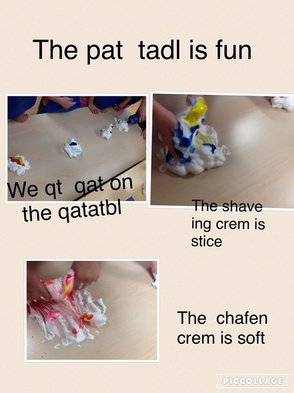 After an exploration at the paint table, a few girls got together to share their learning. They each chose a picture and helped each other sound out the words for the caption. "The paint table is fun. We put paint on the paint table. The shaving cream is sticky. The shaving cream is soft." 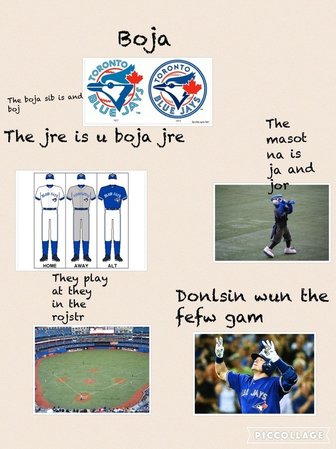 A student who is interested in sports has enjoyed sharing his knowledge of his favourite sports teams in pic collage. For this project, he worked with a teacher to find safe to use images. Then he worked independently to type titles and captions for each of the images he chose. "Blue Jays. The blue jays symbol is a blue jay. The jersey is a blue jay. The mascot is jay and junior. They play (at the) in the rogers centre. Donaldson won the first few games."
By now, our students felt very comfortable using Explain Everything and Draw and Tell. They could take a photograph of their work, and use one of the apps to show their learning. In fact, some of our students were so familiar with the apps, they almost appeared bored with them. That was how we knew they were ready for a new app. Our hope was that a new app would enhance their motivation to share their thinking, and build on their developing communication skills.
We first had a chance to explore ChatterPix-Kids at an ETFO Summer Academy course led by Kristen Wideen, who used the app to showcase another way for students to share their learning. Not only did it seem easy to use but, most importantly, it seemed fun! With Chatterpix-Kids, students take any photograph and make it talk. After giving our students time to explore the app, we had talking garbage bins, shoes and pictures of themselves. Who could resist that? It should be noted that whenever we introduce a new app like ChatterPix-Kids to our students, we give them time to explore the app on their own. We show them the basics, and then let them loose! This strategy, of letting them play, may at first seem counterproductive. Haven't we been saying all along that we want our students to see the iPads as tools and not toys? When we let them play at the beginning, they get it all "out." All the giggles, and silliness are gone by the time we show our students what they can really do with the app. After our students had played with the app, we made a natural link between this app, and the animal research our students had been conducting using the web based program Pebblego. Our students were very motivated to use the app. However, in order for them to see the app as a learning tool, we made them a deal: first do the research (by using a graphic organizer to describe what the animal looks like, eats and where it lives), and then use the app to make their research come to life. Our students were hooked and their motivation to share their learning increased tremendously!
As our students became even more comfortable using ChatterPix-Kids, they started to see the value in using the app to make their block towers, Lego robots and artwork, come to life as well.
Not only was this app fun to use, but it motivated our students to share their learning. While we initially introduced it as a way for our students to share their animal research, it didn't take long before students were asking to use this app to explain how they built something, whether with different building materials or at the art table. Overall, this app proved to be a valuable tool to motivate our students to think critically and communicate with their teachers and peers.When we looked at our results, we noticed that motivation was a factor. While some of our students were content using Draw and Tell and Explain Everything to document their learning, our struggling students seemed to find this a tedious task. Whether they were simply bored with the apps we were using, or annoyed by having to interrupt their play to record their thinking, we wondered: How could we motivate those students to communicate and share their thinking more willingly?
We decided to try some new apps to further engage and motivate our students. Apps that were open ended, easy to use and, most importantly, fun! In addition to trying new apps, we wanted to give those students a chance to be "experts" in the apps we used. Could these strategies help to motivate our struggling students? Would they help to increase their communication and thinking skills? Chatterpix by Duck Duck Moose is the first app we chose to start with. It is an easy to use app that is open-ended, lending itself to many different uses in our classrooms. Most importantly, the app is fun and engaging - exactly what we were looking for. This became our plan. We would introduce this app to the students we had identified as needing extra support. We would show them the mechanics of the app, and how to use the app to communicate their thinking. These students would then become our "expert" students. They would teach students in another class (or their peers) how to use the app. Through doing this, our "experts" would be communicating with their peers in an authentic way. Several questions came up as we were discussing this new plan:
Stay tuned to hear all about how this next step in our journey went. When discussing our results, we discovered that our findings were quite varied. We were not able to make general conclusions between classes, as our results were dependent upon so many factors. The different environments of our classrooms, and the unique needs of our learners, added to these variations.
One class noticed significant improvements when they recorded their work outside of the classroom. However, upon further discussion, we wondered if these students performed better because working in a space outside of the classroom was a very rare and special occurrence for the students. We also wondered if it was because the space that was chosen had very limited distractions for the students. The other classes did not find any significant differences, and wondered if this may be because the 'removed' environments that were chosen were not as motivating for students, as they tended to be areas where the students frequently worked in, for various small group lessons or activities. We also wondered if the areas chosen for these classes might have been more distracting as they were both high-traffic hallway and pod areas. Our results were even more varied when it came to timing. One class did not find any significant improvements when students were asked to record at a later time. When discussing this teacher's observations, it was noted that many of the students had moved on to other activities, and did not enjoy being interrupted from their next project in order to make another recording. It was also noted that they did not always share the same amount of details when recording at a later time. We wondered if this might be because students remembered what they had previously said, and didn't understand if or why they should be repeating the ideas they had recorded earlier. Some particular students though, seemed to be much more successful when recording at a later time. However, the unique student needs seemed to be a factor. One of the successful students may have benefitted from further time to process his thoughts and build vocabulary about their work. Another student may have benefitted from the later time due to peer role modelling, as he spent the time between recordings observing some of his peers making recordings about their work as well. Our discussion circled, and left us with a few general questions:
We began sharing the different approaches we used, to directly instruct our students on how to improve their recordings. One teacher used small group instruction with her selected students. She engaged them in oral discussions about what ideas they could possibly share about their work. When they were ready to record, she reminded them of the things they had previously discussed before they did their recording. 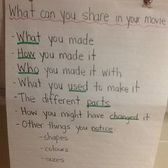 Another teacher used large group instruction, as the whole class had already seen and given feedback to some of the students' previous recordings. The class made an anchor chart of the ideas they had (see image). Then, when it was time to record, the teacher reviewed the anchor chart with the students and discussed some of the ideas before they recorded their work. 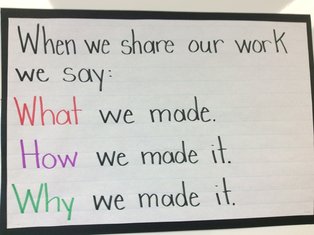 After much discussion, we agreed that the third teacher's approach seemed to be most successful. In her class, she began by showing two recordings, each one describing an airplane made out of Lego. The first example was very basic ("I like my airplane"). In the second recording, the speaker elaborated about their airplane ("I made an airplane. I made it out of Lego. I use two red pieces and three yellow pieces. I made an airplane because I like airplanes."). She encouraged the class to talk about what made the second recording better. With some support, students talked about three important elements, and these became the framework for sharing their work. Students needed to share what they made, how they made it, and why they made it (see image below). We discussed that these simple, yet open-ended prompts gave our youngest students a clear guideline with which to frame their ideas. This educator also paired her instruction with large-group sharing of student work samples. She explained how she used this sharing time to reinforce her ideas. She would show student recordings two times. The first time, the students could listen and watch for enjoyment. The second time, the students were prompted to listen and decide if the student was successful in sharing the three main points. They would then continue their discussion about the finer details of the recording. She may have highlighted a particular sample where a student didn't just name their work, but also labelled many of it's parts. She may have also focused on a work sample that used the 'why' requirement to make a connection to their own lives, sharing, "I made this airplane because I went to an airplane museum and I liked looking at the airplanes there." We discussed how the simple, clear, and open-ended prompts helped these students improve their recordings about their work. We also knew that the way this educator intentionally shared and discussed student work samples was a key element in her improved results.
Now that we were more comfortable using Explain Everything and Draw and Tell, we decided that we needed to provide some direct instruction for the students in order to demonstrate what good oral communication and critical thinking skills looked like. We felt that by documenting student work both pre- and post- direct instruction, we could begin to learn what works best and what may not work for our students. We wanted to be able to measure their growth throughout this journey and not just at the beginning and end. In our last session, we compared student work samples from each of our classes. While comparing with each other, we noticed that the settings where the learning took place (e.g., pod, classroom, hallway) and our time delay (e.g., how much time passed between when the student made their creation and when they sat down and explained it) both varied quite a bit between our classes. This brought up a few questions that we decided to explore:
1) Is a quiet space (e.g., pod or hallway) better than in the busy (and often noisy!) classroom environment? 2) Is it better for a student to have a time delay between when they made their creation and when they explain it (in order to think of more details) or is it better to have students explain their creations right away, when they are excited about them? To give us more insight into these questions, we planned to ask our students to do a recording both in the moment, and after 30 minutes, to see which might produce more detailed explanations. We also planned to take these snapshots of student learning in two different settings: In a quiet space (e.g., pod/hallway) and also in the classroom, where the learning originally occurred. After our pre-direct instruction samples were finished, we planned to teach our students how to explain their creations in detail. But how did we do that? Did the students show progress? Check out our next post to find out! 'We knew that the easiest entry point when introducing our students into using the iPad to enhance their learning was to start with apps that had the capability to record their voice along with a photo of a concrete work sample from the classroom environment. We chose Draw and Tell and Explain Everything. We experimented with both apps in our classrooms to discover their capabilities, and gain a better understanding of how our students were interacting with them. We were then able to compare and contrast which apps were more suited to our students' needs and our intentions. Explain Everything As we began working with Explain Everything, we discovered it was best to introduce it with students one on one or in very small groups as a motivating way to "share" their work in the classroom. This app allows students to import a picture of their work (or a sequence of photos of work) and record their voice. Students can also use a writing tool to draw on the photo of their work while they are speaking about it, or use a laser pointer that follows their finger while they point to different features and explain them. It also allows students to pause their recording, if necessary, and continue adding to it. This feature is valuable if any interruptions happen (as they often do in busy kindergarten classrooms!). As educators, we appreciated that there is an option for a "simple interface" that is easy to navigate for little kindergarten fingers (see below). We also see the benefit in it's ability to capture multiple slides with recordings in order to capture a process or developing story. 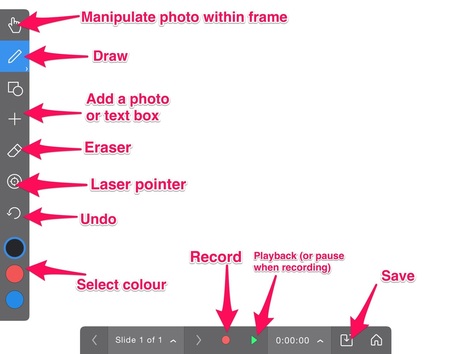 Draw and Tell We introduced this student-friendly app in a similar was as we did with Explain Everything. Individual or small groups of students were shown the basics of this app, and they were very motivated to begin using it to share their learning. With Draw and Tell, students can either draw a picture or upload a photo of their work. They can add stickers or draw on top of their image, to add detail to it. When they are ready, students press the microphone button and record their voice. As students talk, they can touch the screen and see a blue highlighted circle follow their touch. When they are finished recording, students can listen to their recording and are motivated with applause upon finishing their play back. To save their work, students press the back arrow and upload it to the camera roll. Draw and Tell is a fun, engaging app, with bright colours, cute stickers and an easy to navigate interface. While there are many other uses for this app, we found it to be a useful tool for capturing students' oral descriptions of their work. 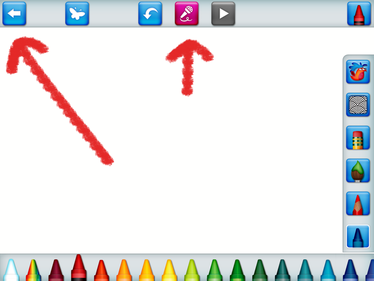 We created a useful features comparison chart between Draw and Tell and Explain Everything. See below. 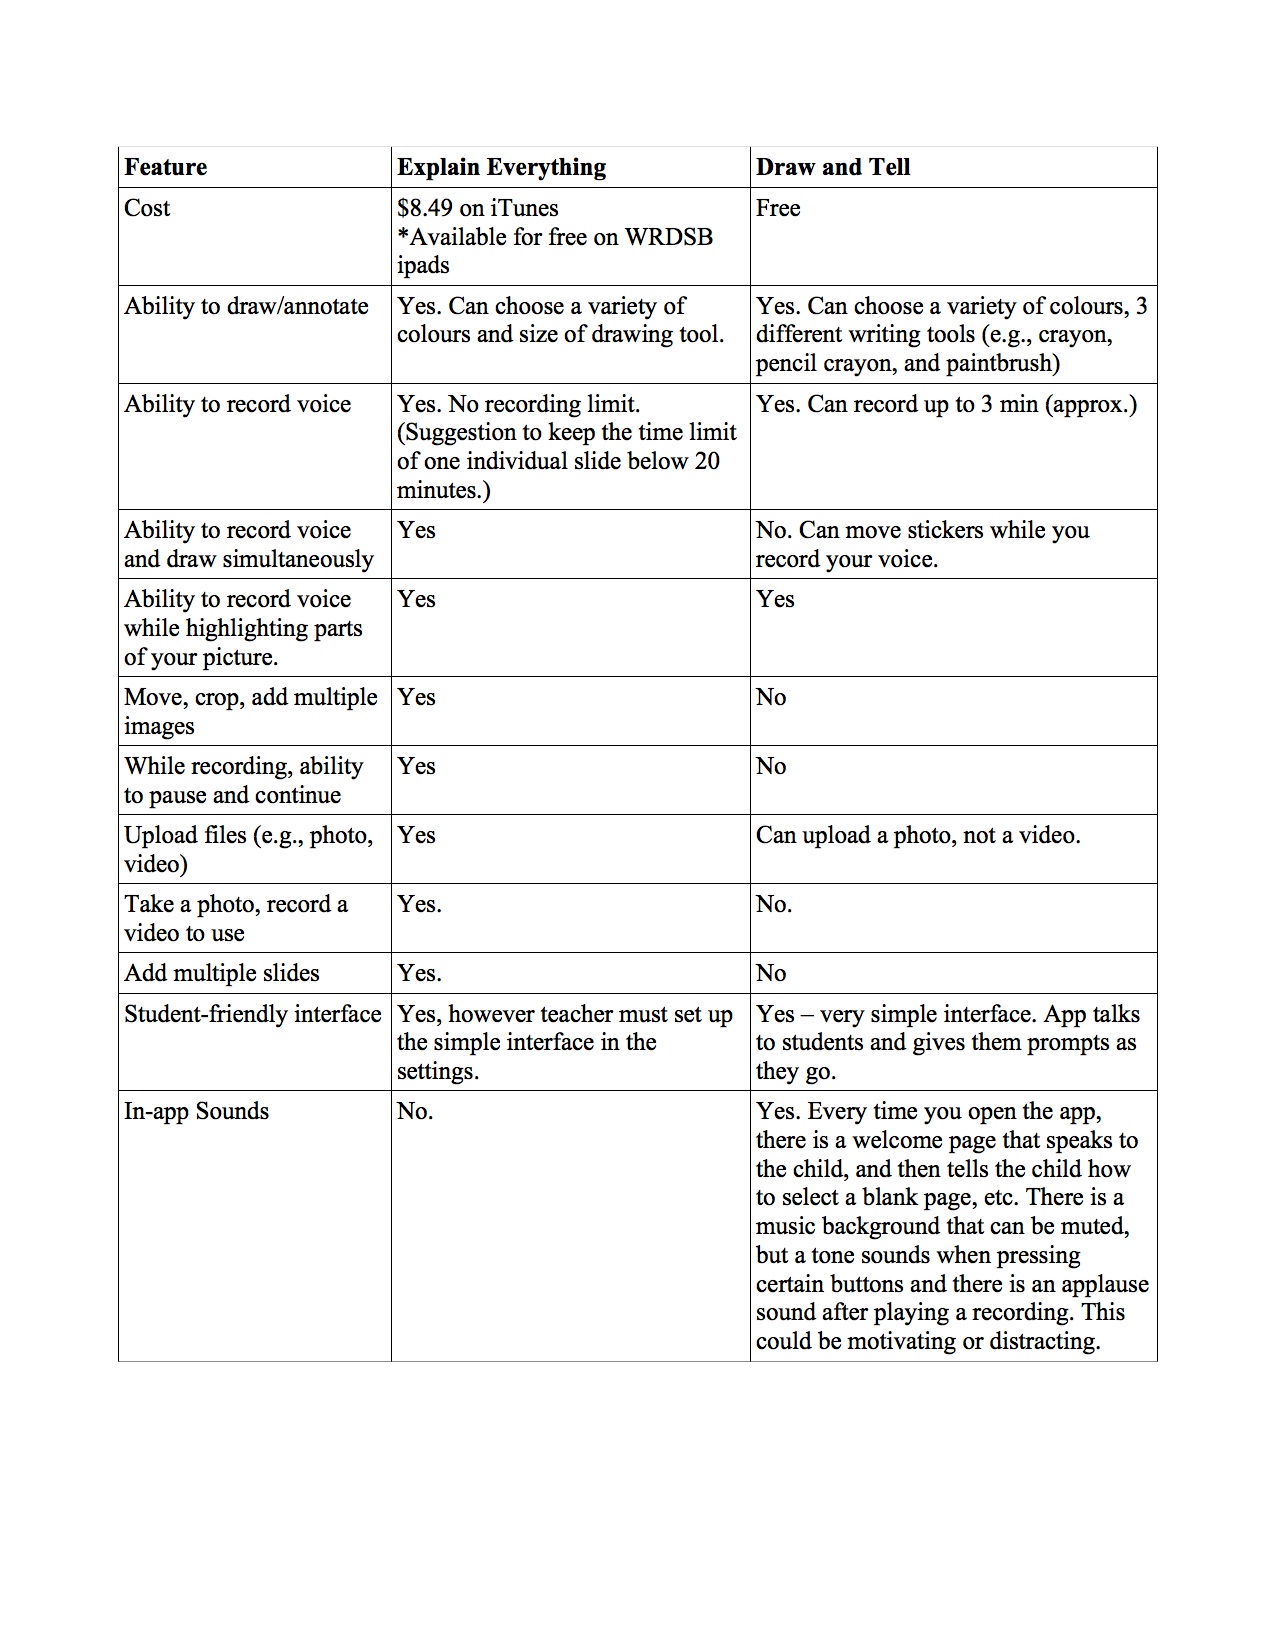 |
Authors
We are a group of Kindergarten educators in Ontario, Canada. Archives
May 2017
Categories |
 RSS Feed
